With so many Testing frameworks out there, it can be terribly confusing to know which tool suits best for performance testing - especially if you are looking for developer friendly open source framework.
Here, I am going to share my experience with one of the popular open source load testing tool k6.io.
What fascinates me about k6 is its very simple scripting and its strong support with numerous Integration tools(more on this towards the end).
Yes you are right, it's JavaScript. k6 scripts are written using JS.
Below sample k6 Test :
import http from 'k6/http';
import { sleep } from 'k6';

export default function () {
  http.get('https://test.k6.io');
  sleep(1);
}
Let's understand the steps to get this up and running.
Installation
k6 offers multiple ways of installation more on this here. I am using Homebrew on my Mac to setup k6.
brew install k6To verify the installation, on your terminal try the below command. It must return the installed version.
k6 versionRunning k6
Now It's time to write the scripts and run them using k6. Let's assume we need to test the endpoint
https://test.k6.ioand examine if its meeting defined expectations (SLO).create a file (Test.js) on any of your preferred editor and add the below snippet.
 import http from 'k6/http';
 import { sleep, check } from 'k6';

 export const options = {
   thresholds: {
         http_req_duration: [
             {threshold: 'p(95)< 1000'},
         ]
     },
 }

 export default function () {
   // endpoint to test
   const response = http.get('https://test.k6.io');
   // verify the response
   check(response, { "status code should be 200": (res) => res.status == 200 })
   // sleep for a second.
   sleep(1);
 }
Let's break it down.
- We have options for the k6 ( explore here ), I am informing k6 to check for the latency (p95) to be less than 40 ms.
The default function is entry point for our tests. This is where we call the actual endpoint and validate the results.
It's time to run our tests. we are running the test for 1 minute duration. Open the terminal and execute the below command.
k6 run --duration=1m Test.js
Test Report
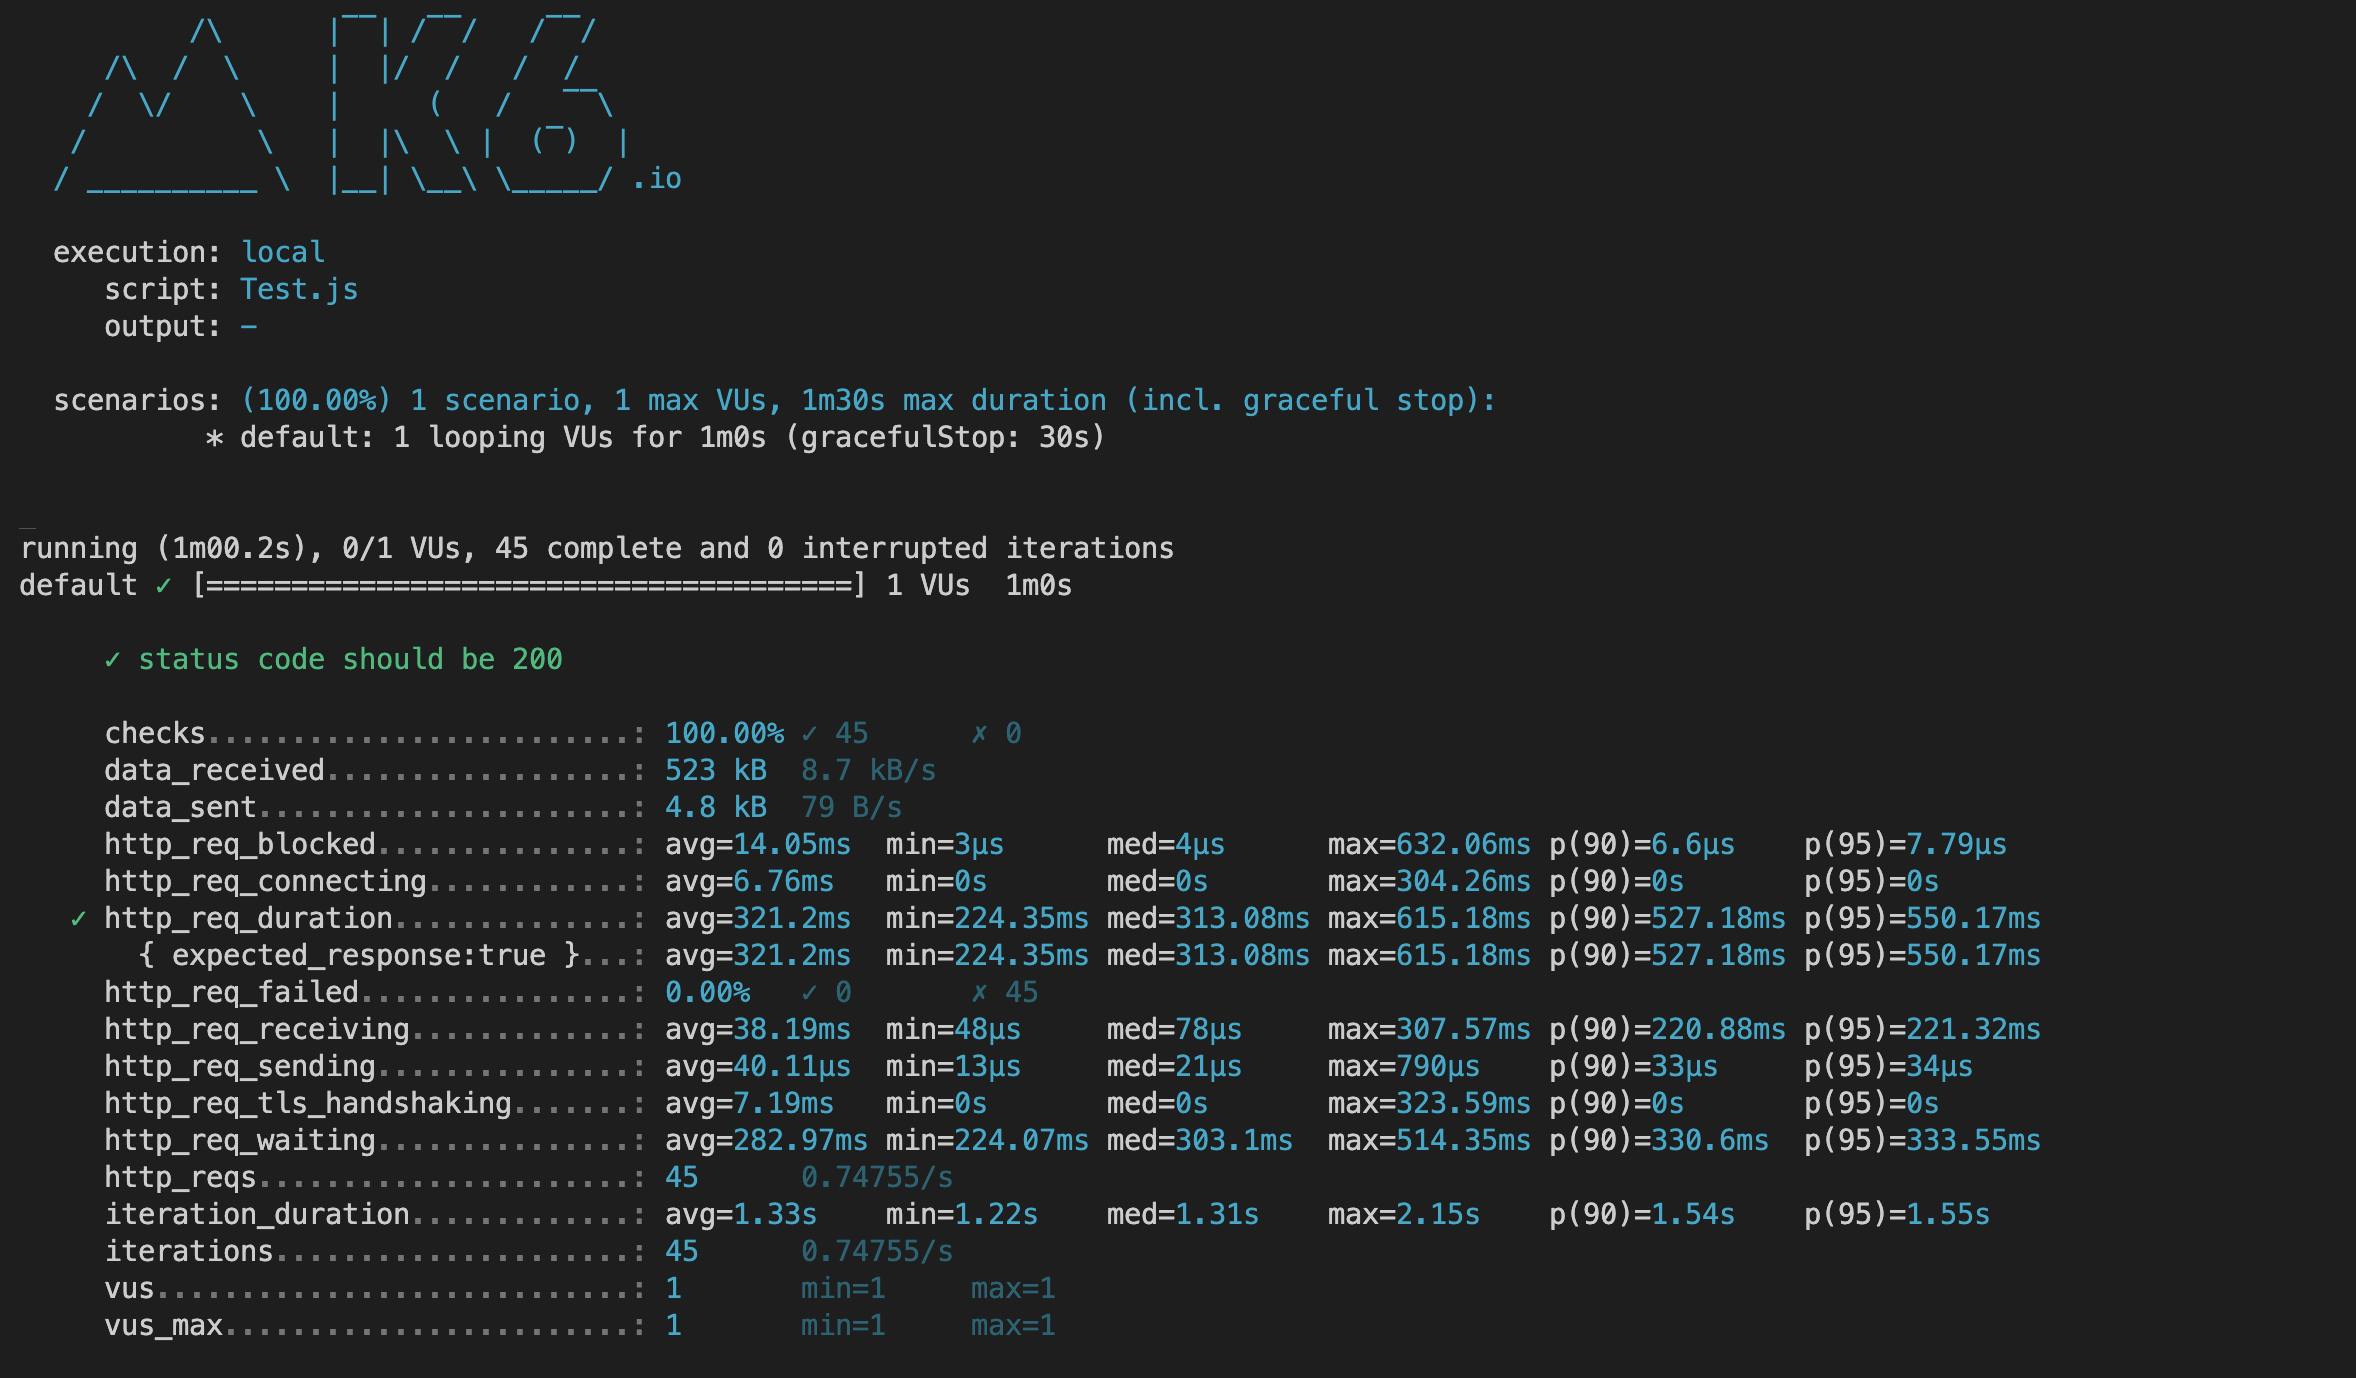
While k6 generates the load for your test, it also captures the metrics that measure the performance of your service.
k6 comes with built-in metrics about the test load and the system response.
Key metrics include:
- http_req_duration, the end-to-end time of all requests (that is, the total latency)
- http_req_failed, the total number of failed requests
iterations, the total number of iterations
Results from our previous test run looks like below. We can see that both the checks have passed for test ( status must be 200 & http_req_duration- p95 less than 1000ms).

As discussed earlier, one other great feature is Integration support.
k6 offers capabilities to export the results to formats like JSON, CSV and also publish to various datasource like Datadog, Grafana and many more. Check the complete documentation here.
Conclusion:
We saw how we can leverage k6 a powerful load testing tool to test the performance of microservices and also analysed the outcome of the test.
Thank you for staying with me so far. Hope you liked the article. Happy reading.
References :


